Autokros: Porovnání verzí
| Řádka 27: | Řádka 27: | ||
=== Ovládání === | === Ovládání === | ||
| − | + | Pohled - myší a klávesami uvedenými na obrazovce.<br> | |
| − | + | Stiskěnte klávesu V pro přepínání mezi pohledem shora a zdola.<br> | |
| − | + | Prohlížení trati - stiskněte mezerník pro zapnutí nebo vypnutí tlačítek editoru, abyste měli lepší náhled na trať. | |
| − | + | Měření vzdálenosti: Stiskněte klávesu D pro zapnutí měřiče vzdálenosti. | |
<!-- links to other languages --> | <!-- links to other languages --> | ||
[[de:Autocross Editor]] | [[de:Autocross Editor]] | ||
Verze z 15. 11. 2006, 19:59
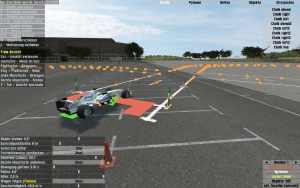
Autocrossový editor - Manuál
Poznámka: Autocrossový editor funguje pouze v plné (odemčené) verzi Live for Speed.
Autocrossový editor spustíte přímo ve hře stisknutím SHIFT+U. Můžete ukládat nebo nahrávat layouty a dále je upravovat, pokud zvolíte "Ano" u položky Umístit objekty.
Všechny funkce editoru jsou dostupné přímo na obrazovce. Autocross funguje také při online hraní. Hostitel může upravovat nebo nahrávat layout, i když jsou ostatní hráči připojeni.
Pro vytvoření autocrossového layoutu je potřeba umístit objekty, kontrolní body a startovní čáru. Pokud neumístíte startovní čáru, použije se standardní startovní rošt jako na normální trati. V tomto případě se nepoužijí časové penalizace, ale je potřeba umístit kontrolní body, aby byly počítány časy kol.
Umístění objektů
Zvolte typ objektu a umístěte ho stisknutím klávesy O. Můžete nastavit směr objektu použitím < a > kláves. Stisknete-li při vybraném objektu klávesu M, spolu s nastavením směru se tento objekt přesune tam, kde máte kurzor myši.
Umístění kontrolních bodů
You need one finish line and at least one checkpoint. In effect this defines the circuit, and also gives you split times at those points. Pressing F or 1, 2, 3 gives you a finish line or a checkpoint. You can adjust their direction and width in the same way as you do for objects, by pressing the M key. Checkpoints are invisible when driving - it is up to the person who edits the track to make sure the user drives through them, by using cones or other objects. The W and E keys can be used to set the width of a checkpoint.
NOTE : direction is important with checkpoints. You must drive over a checkpoint in the correct direction or no time will be recorded.
A checkpoint looks like a square bracket, and you must drive FROM the side with the "ends" of the square bracket and over TO the "flat side" of the square bracket.
Restricted areas and route control
In "marshall" mode you can place Marshall areas and Route checkers.
Marshall areas are shown by a red circle. If a car enters one of them in single player, it will receive a 1 minute penalty. In multiplayer mode, the player will be forced to spectate.
Route checkers are shown by a green circle. Each route checker has a route index number which is shown near the top right of the screen when a route checker is selected. Cars must pass through these route checkers in the correct order, or they will receive a penalty or be forced to spectate. The route index is automatically generated in the order the route checkers are created. You can manually edit the route index by clicking on the route index button.
Ovládání
Pohled - myší a klávesami uvedenými na obrazovce.
Stiskěnte klávesu V pro přepínání mezi pohledem shora a zdola.
Prohlížení trati - stiskněte mezerník pro zapnutí nebo vypnutí tlačítek editoru, abyste měli lepší náhled na trať.
Měření vzdálenosti: Stiskněte klávesu D pro zapnutí měřiče vzdálenosti.
