Nastavení: Porovnání verzí
(→Audio) |
m (doplněny odkazy na stránku v jiných jazycích) |
||
| (Není zobrazeno 14 mezilehlých verzí od stejného uživatele.) | |||
| Řádka 7: | Řádka 7: | ||
'''Hlasitost zvuku smyku:''' Zesílí reálný zvuk smyku, aby byl lépe slyšet. Nastavte na 1 pro "realistickou" hlasitost. | '''Hlasitost zvuku smyku:''' Zesílí reálný zvuk smyku, aby byl lépe slyšet. Nastavte na 1 pro "realistickou" hlasitost. | ||
| − | '''Hlasitost větru:''' Stejné jako výše, ale pro větrné efekty. Všimněte si, že bez ohledu na toto nastavení, bude hluk způsobený obtékajícím vzduchem mnohem vetší u otevřených aut, než u vozů s pevnou střechou. | + | '''Hlasitost zvuku větru:''' Stejné jako výše, ale pro větrné efekty. Všimněte si, že bez ohledu na toto nastavení, bude hluk způsobený obtékajícím vzduchem mnohem vetší u otevřených aut, než u vozů s pevnou střechou. |
'''Intenzita ozvěny:''' Určuje hlasitost ozvěny. Základní hodnota 2,0 by měla být realistická, ale můžete ji samozřejmě změnit, aby vám vyhovovala. | '''Intenzita ozvěny:''' Určuje hlasitost ozvěny. Základní hodnota 2,0 by měla být realistická, ale můžete ji samozřejmě změnit, aby vám vyhovovala. | ||
| Řádka 15: | Řádka 15: | ||
'''Hlasitost zvuků v menu:''' Hlasitost zvuků tlačítek a ostatních v menu hry. | '''Hlasitost zvuků v menu:''' Hlasitost zvuků tlačítek a ostatních v menu hry. | ||
| − | '''Hudba v | + | '''Hudba v menu:''' Zapíná, nebo vypíná hudbu v menu. |
'''Hudba v průběhu závodu:''' Zapíná, nebo vypíná hudbu, která hraje v průběhu závodu. | '''Hudba v průběhu závodu:''' Zapíná, nebo vypíná hudbu, která hraje v průběhu závodu. | ||
| Řádka 25: | Řádka 25: | ||
'''Hudba v průběhu hry:''' LFS podporuje playlisty a zde můžete vidět a měnit, který playlist je zrovna přehráván. Pomocí "přeskočit" se můžete o skladbu přesunout, pomocí "zvolit" můžete skladbu přímo vybrat. | '''Hudba v průběhu hry:''' LFS podporuje playlisty a zde můžete vidět a měnit, který playlist je zrovna přehráván. Pomocí "přeskočit" se můžete o skladbu přesunout, pomocí "zvolit" můžete skladbu přímo vybrat. | ||
| − | '''Kanály:''' Pomocí tohoto tlačítka se dostanete do rozhraní pro vytváření a úpravu playlistů. Channel 1 je standardní pro všechny obrazovky nastavení a nemůže být smazán. Jednotlivé playlisty můžete přidávat, přejmenovávat a mazat v levé časti obrazovky. Vpravo můžete přidávat stopy, přiřazovat skladby jednotlivým stopám a mazat stopy. K zajištění, že stopy budou přehrávány, můžete nastavit jejich prioritu(3 nejvyšší,1 nejnižší). | + | '''Kanály:''' Pomocí tohoto tlačítka se dostanete do rozhraní pro vytváření a úpravu playlistů. Channel 1 je standardní pro všechny obrazovky nastavení a nemůže být smazán. Jednotlivé playlisty můžete přidávat, přejmenovávat a mazat v levé časti obrazovky. Vpravo můžete přidávat stopy, přiřazovat skladby jednotlivým stopám a mazat stopy. K zajištění, že stopy budou přehrávány, můžete nastavit jejich prioritu(3 nejvyšší, 1 nejnižší). |
| − | ''TIP:'' Hudební soubory v LFS jsou ve formátu Ogg Vorbis. Můžete vytvářet své vlastní hudební soubory pomocí volně dostupného převaděče na www.vorbis.com nebo pomocí Audacity. Aby mohly být skladby přehrány v LFS, musí být ve složce | + | ''TIP:'' Hudební soubory v LFS jsou ve formátu Ogg Vorbis. Můžete vytvářet své vlastní hudební soubory pomocí volně dostupného převaděče na www.vorbis.com nebo pomocí Audacity. Aby mohly být skladby přehrány v LFS, musí být ve složce data/ogg . |
== Obrazovka == | == Obrazovka == | ||
| − | [[image: | + | [[image:Obrazovka.jpg|thumb|Nastavení obrazovky]] |
V tomto menu si můžete zvolit požadované rozlišení, barevnou hloubku a obnovovací frekvenci obrazovky. Můžete také přiřadit klávesové příkazy jednotlivým konfiguracím obrazovky. | V tomto menu si můžete zvolit požadované rozlišení, barevnou hloubku a obnovovací frekvenci obrazovky. Můžete také přiřadit klávesové příkazy jednotlivým konfiguracím obrazovky. | ||
| − | ''' | + | '''Tlačítka 16 bitů | 32 bitů | vše:''' Přepne módy na 32bitovou, 16bitovou nebo všechny barevné hloubky. |
'''Širokoúhlý efekt:''' Simuluje efekt sledování širokoúhlého filmu na běžné 4:3 TV, zobrazením černých pruhů nahoře a vespod obrazovky. | '''Širokoúhlý efekt:''' Simuluje efekt sledování širokoúhlého filmu na běžné 4:3 TV, zobrazením černých pruhů nahoře a vespod obrazovky. | ||
| Řádka 42: | Řádka 42: | ||
== Grafika == | == Grafika == | ||
| − | [[image: | + | [[image:Maxgrafika.jpg|thumb|Maximální nastavení grafiky (kvalita)]] |
| − | [[image: | + | [[image:Mingrafika.jpg|thumb|Minimální nastavení grafiky (výkon)]] |
V tomto menu najdete veškerá nastaveni pro kvalitu grafiky. Pečlivé vyladění těchto nastavení, může zvýšit framerate, nebo vylepšit kvalitu detailů. Vypnutím, nebo snížením některých možností můžete podstatně vylepšit herní prožitek, zejména u počítačů, jejichž sestava není zrovna nejnovější. | V tomto menu najdete veškerá nastaveni pro kvalitu grafiky. Pečlivé vyladění těchto nastavení, může zvýšit framerate, nebo vylepšit kvalitu detailů. Vypnutím, nebo snížením některých možností můžete podstatně vylepšit herní prožitek, zejména u počítačů, jejichž sestava není zrovna nejnovější. | ||
| − | ''' | + | '''Úroveň detailů:''' Tato volba ovlivňuje úroveň detailů ve hře, tzn. kvalitu objektů a textur a vzdálenost vykreslování. Například pneumatiky budou na počítači se sníženými detaily vypadat hranatě.<br> |
| + | ''Výkon: 0.40 | kvalita: 1.00'' | ||
| + | |||
| + | '''Úroveň detailů v zrcátkách:''' Ovlivňuje kvalitu obrazu v zrcátkách, podobně jako "Uživ. úroveň detailů" v kokpitu.<br> | ||
''Výkon: 0.25 | kvalita: 1.00'' | ''Výkon: 0.25 | kvalita: 1.00'' | ||
'''Úroveň detailů prachu:''' Volba ovlivňuje kvalitu prachu a kouře.<br> | '''Úroveň detailů prachu:''' Volba ovlivňuje kvalitu prachu a kouře.<br> | ||
| + | ''Výkon: 0.25 | kvalita: 1.00'' | ||
| − | '' | + | '''Anti-aliasing:''' Čím vyšší hodnota, tím jsou hrany objektů více vyhlazené.<br> |
| − | ''' | + | '''Filtrování textur / AF:''' Textury jsou vytvořeny v různých úrovních detailů závisejících na velikosti, ve které budou vykresleny na obrazovce. Tyto úrovně detailů se nazývají mipmapy. V případě, že je textura vykreslena v menší velikosti (např. pokud je objekt daleko), je použita menší mipmapa. |
| − | |||
| − | + | Volba filtrování textur ovlivňuje způsob míchání mipmap. | |
| − | |||
| − | ''' | + | '''žádné :''' Bilineární filtrování – žádné míchání – bude použita pouze nejbližší mipmapa<br> |
| − | '' | + | '''1x :''' Trilineární filtrování – výsledný obrázek je smíchán ze dvou nejbližších mipmap<br> |
| + | '''2x–16x :''' Anisotropické filtrování – snižuje rozmazání objektů vykreslených v nepřímých úhlech.<br> | ||
== Pohled == | == Pohled == | ||
| − | [[image: | + | [[image:Pohled.jpg|thumb|Pohled]] |
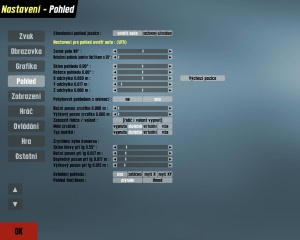
| − | + | Nastavení v menu Pohled upravuje pohled kamery ve hře. Vytvoření osobního nastavení se doporučuje a správný pohled pro požitek z jízdy je nejdůležitější. Pojďme si projít, jaké jsou možnosti od shora až dolů. | |
| − | ''' | + | '''Zorné pole:''' Šířka pohledu ve hře, také známá jako úroveň zoomu. Menší nastavení zorného pole způsobí, že to, co je uprostřed obrazovky, bude větší, ale naopak nebude téměř nic vidět po stranách, což je také důležité. Větší zorné pole vytvoří dobrý výhled po krajích, ale uprostřed bude pohled vzdálený. Je na vás, jak si zorné pole nastavíte, zkuste si s tím pohrát. Implicitní nastavení je okolo 90°. |
| − | ''' | + | '''Posuny/sklony řidiče při 1 G:''' Definice toho, jak se pohled z auta nebo volitelný pohled posunují a naklánějí podle G sil. Pokud všechny hodnoty nastavíte na 0, kamera se nebude jakkoliv hýbat. |
| − | ''' | + | '''Standardní pohled jezdce:''' Ve hře lze mít 2 statické kamery, a to buď standardní pohled z kokpitu, který je nejrealističtější, nebo vlastní pohled, který může být umístěn kdekoliv. Jak si vytvořit vlastní pohled, bude vysvětleno později. Výběrem jednoho z nich jej nastavíte jako implicitní a pohled bude nastaven pokaždé když hru spustíte. Také se na něj lze přepnout pomocí kláves SHIFT + F1. |
| − | ''' | + | '''Sklon pohledu:''' Vertikální náklon kamery. Zde se nastavuje vertikální směr kamery, při nastavení kladné hodnoty se kamera může naklánět nahoru a při zadání záporné hodnoty se kamera naklání dolů. |
| − | ''' | + | '''Rotace pohledu:''' Horizontální natočení kamery. V záporných hodnotách se kamera otáčí doleva a při kladných se otáčí doprava. |
| − | ''' | + | '''Posun zrcátka:''' Změněním těchto hodnot se zpětné zrcátko posune horizontálně (boční posun zrcátka) a nebo vertikálně (výškový posun zrcátka). Ujistěte se, že je zrcátko dobře viditelné a že v něm dobře uvidíte auta za vámi. |
| − | ''' | + | '''Typ budíků:''' To určuje, jak jsou budíky (rychloměr, palivo atd.) zobrazeny. 'Vyp' nezobrazí nic, 'skutečné' zobrazí budíky přímo ve voze a 'virtuální' je zobrazuje na obrazovce mimo auto. |
| − | ''' | + | '''Pohybovat pohledem s animací:''' Toto nastavení určuje, jestli se má kamera pohledu jezdce pohybovat synchronně s pohybem řidiče. Je to reálné, ale je na každém, zda si to nastaví nebo ne. |
| − | ''' | + | '''Zobrazit řidiče / volant:''' Toto nastavení mění to, co vidíte z pohledu z kokpitu. Buď je zobrazen, řidič s volantem, nebo pouze volant a nebo nic. Lidé, kteří používají pro ježdění volant, si zpravidla volant skryjí, protože to nevypadá zrovna reálně mít dva volanty pohybující se tím samým směrem. |
| − | ''' | + | '''Ovládání pohledu:''' Pomocí této volby můžete nastavit různé další způsoby otáčení pohledu doleva nebo doprava. Zvolením možnosti Osa se pohled bude otáčet pomocí osy zvolené v menu Ovládání. Po zvolení volby zatáčení se bude natáčet pohled při zatáčení. Pokud tedy budete zatáčet doleva, pohled se také natočí doleva. To se může hodit, dyž chceš vidět více do směru, kam zatáčíš. Pomocí posuvníku Citlivost pohledu lze nastavit, jak hodně se kamera bude otáčet. To find a good value for the sensitivity, steer all the way to one side and adjust the Look sensitivity to what is the maximum allowed amount of movement to one side. Ms X will move the camera left and right along with the mouse. Look sensitivity does the same as described above. Look centre reduction will alow you to define how easily the camera should stay in the forward looking position. Setting it at a high value will result in having to move the mouse alot to move it out of the forward looking position. At a low value, it will move exactly like the mouse with no centre movement reduction. Ms XY does the same except the camera moves up and down with your mouse as well, making it more adjustable. |
| − | ''' | + | '''Pohled tlačítkem:''' Setting this option will define how the camera should look left and right when you press the Look left and Look right buttons specified in the Controls menu. Smooth will pan the camera gently to the side when you press the button, instant will show you the side inmediately without movement. |
| − | === | + | === Nastavení vlastního pohledu === |
(Note: every custom camera you set up is saved per car. This way you can make a different custom camera in every car.) | (Note: every custom camera you set up is saved per car. This way you can make a different custom camera in every car.) | ||
| Řádka 110: | Řádka 113: | ||
When you are done setting up a custom camera, click in car again in the Default driver view option if you want the default view to be used as the standard view. Though, if you are happy with the new custom view, keep it on custom so it will always be used as the primary view. | When you are done setting up a custom camera, click in car again in the Default driver view option if you want the default view to be used as the standard view. Though, if you are happy with the new custom view, keep it on custom so it will always be used as the primary view. | ||
| − | === | + | === Užitečné klávesy a zkratky === |
| − | '''V :''' | + | '''V :''' Přepíná mezi pohledy.<br> |
| − | '''SHIFT + V :''' | + | '''SHIFT + V :''' Přepíná mezi kamerami pozpátku.<br> |
| − | '''TAB :''' | + | '''TAB :''' Přepne na další auto.<br> |
| − | '''SHIFT + TAB :''' | + | '''SHIFT + TAB :''' Přepne na předchozí auto.<br> |
| − | '''HOME :''' | + | '''HOME :''' Přepne na tvé auto.<br> |
| − | '''SHIFT + F1 :''' | + | '''SHIFT + F1 :''' Vrátí pohled na standardní pohled.<br> |
| − | '''SHIFT + F :''' | + | '''SHIFT + F :''' Skryje texty a zobrazení kromě chatu.<br> |
| − | '''SHIFT + M :''' | + | '''SHIFT + M :''' Přepíná režimy zrcátek. (Bez zrcátek, pouze reálná zrcátka nebo reálná zrcátka + virtuální.)<br> |
| − | '''SHIFT + U :''' | + | '''SHIFT + U :''' Přepne do autokrosového editor/Free view -mode.<br> |
== Zobrazení == | == Zobrazení == | ||
| − | [[image:Display.jpg|thumb| | + | [[image:Display.jpg|thumb|Zobrazení]] |
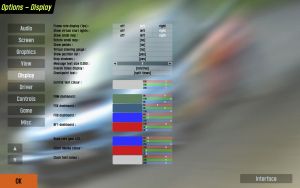
| − | Můžete si zde změnit | + | Můžete si zde změnit rychloměr, typ zrcátek nebo zapnout mapu tratě. |
'''Zobrazit počet snímků za vteřinu:''' Vypnuto / Vlevo / Vpravo | '''Zobrazit počet snímků za vteřinu:''' Vypnuto / Vlevo / Vpravo | ||
| − | '''Digitální rychloměr:''' Ano/Ne | + | '''Digitální rychloměr:''' Ano / Ne |
'''Mód zrcátek:''' Vypnuto / Skutečné / Virtuální / Vše. | '''Mód zrcátek:''' Vypnuto / Skutečné / Virtuální / Vše. | ||
| − | ''' | + | '''Zobrazit stíny:''' Ano / Ne |
| − | ''' | + | '''Velikost textu zprávy:''' Upraví velikost textu zobrazeného ve hře, 0.70 je přijatelná hodnota. |
'''Display results:''' Shows a transparent panel that updates and shows lap time differences etc, you can turn on or off here or toggle with Strg + Tab toggle | '''Display results:''' Shows a transparent panel that updates and shows lap time differences etc, you can turn on or off here or toggle with Strg + Tab toggle | ||
| Řádka 140: | Řádka 143: | ||
'''Overall times display:''' Absolute shows most recent gap time for each car compared to each other car. Relative shows the individual gap between each car relative to the lead car. | '''Overall times display:''' Absolute shows most recent gap time for each car compared to each other car. Relative shows the individual gap between each car relative to the lead car. | ||
| − | ''' | + | '''Indikátor manuálního řazení:''' Set to show upshifts only, downshifts only or leave to show all shifts or not display them at all. |
== Hráč == | == Hráč == | ||
| − | [[image:Player.jpg|thumb| | + | [[image:Player.jpg|thumb|Hráč]] |
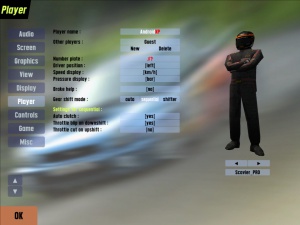
| − | V tomto menu si můžete upravit detaily o sobě, např. | + | V tomto menu si můžete upravit detaily o sobě, např. jméno, text SPZ nebo zemi, ze které pocházíte. Můžete si zde také vybrat jezdce(muže či ženu), helmu nebo barvu kombinézy. |
| − | == | + | == Ovládání == |
| − | [[image:Controls.jpg|thumb| | + | [[image:Controls.jpg|thumb|Ovládání]] |
=== Mouse/Keyboard === | === Mouse/Keyboard === | ||
'''Button control rate:''' This is for when you assign a button to an analogue control (e.g. handbrake or clutch) how fast the control moves when the button is pressed. Higher is faster. | '''Button control rate:''' This is for when you assign a button to an analogue control (e.g. handbrake or clutch) how fast the control moves when the button is pressed. Higher is faster. | ||
| − | '''Keyboard steer:''' keyboard | + | '''Keyboard steer:''' keyboard – no help / keyboard – stabilised / mouse steer toggle. This is how you select your input method: |
'''Mouse steer''' (rather obviously) lets you use the mouse for steering and assign throttle and brake to buttons (be they on your keyboard or your mouse). | '''Mouse steer''' (rather obviously) lets you use the mouse for steering and assign throttle and brake to buttons (be they on your keyboard or your mouse). | ||
| − | ''' | + | '''Klávesnice – bez usnadnění''' directly translates button presses into wheel movement. So long as the button is held down, the wheel will continue turning until it reaches maximum lock. There is an auto return to centre function when no steering keys are pressed. Both rates are configurable. Also, pressing both left and right will hold the wheel in its current position. This steering method is definately not recommended, since it is impractically difficult to race with. |
| − | ''' | + | '''Klávesnice – se stabilizací''' has two main differences to "keyboard – no help". Firstly, it limits the movement of the wheel depending on the amount of grip the tyres have. This limit is also adjustable. Secondly it adds a small amount of automatic countersteering to help balance the car. While this is a driving aid (and the turn limit can be considered one as well), it is essential for using such a basic input device for a task it obviously would never be used to do in real life. Thankfully the keyboard steering is highly configurable in LFS so you should be able to get it to work to your preference. |
| − | ''' | + | '''Automatická převodovka:''' Ano/Ne. Pokud je nastaveno na Ano, počítač bude za vás řadit (a pravděpodobně ve špatný čas). |
''Mouse steer only:'' | ''Mouse steer only:'' | ||
| Řádka 169: | Řádka 172: | ||
'''Steer rate:''' The speed the wheel turns when you press the left or right steer buttons. Higher values will make the car more responsive but less stable, and vice versa. | '''Steer rate:''' The speed the wheel turns when you press the left or right steer buttons. Higher values will make the car more responsive but less stable, and vice versa. | ||
| − | '''Return rate:''' The speed the wheel turns when you depress the left or right steer buttons. Higher values will make the car more responsive but less stable, and vice versa. It is usual to use a lower value for the return rate, between 50 to 75% of the steer rate. | + | '''Return rate:''' The speed the wheel turns when you depress the left or right steer buttons. Higher values will make the car more responsive but less stable, and vice versa. It is usual to use a lower value for the return rate, between 50 to 75 % of the steer rate. |
'''Fast steer multiplier:''' When holding the "Steer Fast" key, the steer rate will be temporarily increased. This slider controls by what percentage it will be increased. With the default setting of 2.00, the steer rate will be doubled. This fast steering option can be useful when quick corrections are needed, such as when countersteering. Chances are you're going to crash anyway so this option is of limited helpfulness. | '''Fast steer multiplier:''' When holding the "Steer Fast" key, the steer rate will be temporarily increased. This slider controls by what percentage it will be increased. With the default setting of 2.00, the steer rate will be doubled. This fast steering option can be useful when quick corrections are needed, such as when countersteering. Chances are you're going to crash anyway so this option is of limited helpfulness. | ||
| Řádka 175: | Řádka 178: | ||
'''Slow steer multiplier:''' When holding the "Steer Slow" key, the steer rate will be temporarily reduced. This slider controls by what percentage it will be reduced. With the default setting of 0.50, the steer rate will be halved. This slow steering option is most useful at higher speeds when finer control over the vehicle is needed. However the keyboard steering is automatically speed sensitive, so there is really no need to ever use this anyway. | '''Slow steer multiplier:''' When holding the "Steer Slow" key, the steer rate will be temporarily reduced. This slider controls by what percentage it will be reduced. With the default setting of 0.50, the steer rate will be halved. This slow steering option is most useful at higher speeds when finer control over the vehicle is needed. However the keyboard steering is automatically speed sensitive, so there is really no need to ever use this anyway. | ||
| − | '''Limit multiplier:''' A setting of 1.0 limits the wheel turn to that of the available grip of the tyres. Settings higher than this allow you to turn further, to induce understeer. Settings lower than 1.0 means you won't get so close to the limits of the car, so control is retained. The further you reduce this setting, the easier the car will be to drive, at the sacrifice of cornering speed. (available with Keyboard | + | '''Limit multiplier:''' A setting of 1.0 limits the wheel turn to that of the available grip of the tyres. Settings higher than this allow you to turn further, to induce understeer. Settings lower than 1.0 means you won't get so close to the limits of the car, so control is retained. The further you reduce this setting, the easier the car will be to drive, at the sacrifice of cornering speed. (available with Keyboard – stabilised only) |
In the Buttons 1 subsection you select which button to assign to the function labelled to the right of the button. To choose and lock in your selection, simply click on the button to highlight it, a text message with instructions will appear at bottom of screen, Click desired button or key you wish to associate with this button etc. Do this for all Button 1 selections, then move on to Button 2 section using the same method to select and assign your desired keys or buttons to control the views etc. | In the Buttons 1 subsection you select which button to assign to the function labelled to the right of the button. To choose and lock in your selection, simply click on the button to highlight it, a text message with instructions will appear at bottom of screen, Click desired button or key you wish to associate with this button etc. Do this for all Button 1 selections, then move on to Button 2 section using the same method to select and assign your desired keys or buttons to control the views etc. | ||
| Řádka 181: | Řádka 184: | ||
When you have completed this, mouse users and keyboard users are finished, and may want to skip the section on wheels and joysticks. And go directly to the far right of this screen and look closely at the various key sequences and what they do. i.e. (Reserved keys) and Shift + combinations. | When you have completed this, mouse users and keyboard users are finished, and may want to skip the section on wheels and joysticks. And go directly to the far right of this screen and look closely at the various key sequences and what they do. i.e. (Reserved keys) and Shift + combinations. | ||
| − | === | + | === Volant/Joystick === |
This section provides different options additional to the previous section. Existing keyboard and mouse settings can still be used just by clicking on the Mouse/KB button. This is useful if your wheel breaks or springs in pedal fall apart. | This section provides different options additional to the previous section. Existing keyboard and mouse settings can still be used just by clicking on the Mouse/KB button. This is useful if your wheel breaks or springs in pedal fall apart. | ||
| Řádka 188: | Řádka 191: | ||
'''Steer center reduction:''' Adjusts the turn ratio of the users wheel to the LFS car. | '''Steer center reduction:''' Adjusts the turn ratio of the users wheel to the LFS car. | ||
| − | ''' | + | '''Síla FF:''' Pro ty, kteří používají Force Feedback, větší hodnota znamená větší síla. |
'''Throttle/brake axis:''' Can be one of three different states:<br> | '''Throttle/brake axis:''' Can be one of three different states:<br> | ||
| − | + | Kombinované: brzdový a plynový pedál jsou na stejné ose<br> | |
| − | + | Separované: brzdový a plynový pedál jsou každý na jiné ose<br> | |
| − | + | Tlačítka: brzda a plyn mohou být jako tlačítko/pádlo | |
| − | ''' | + | '''Typ řazení:''' We have discussed earlier the three types and their use. |
'''Clutch & Handbrake:''' Can be assigned to any spare axis or button if you wish. | '''Clutch & Handbrake:''' Can be assigned to any spare axis or button if you wish. | ||
| Řádka 202: | Řádka 205: | ||
'''Throttle/brake centre reduction:''' Adjusts the sensitivity of the throttle and brake and the point at which it starts to apply. | '''Throttle/brake centre reduction:''' Adjusts the sensitivity of the throttle and brake and the point at which it starts to apply. | ||
| − | === | + | === Nastavení volantu === |
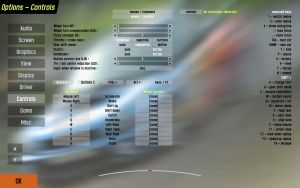
This is the area where wheel and joystick users get to assign the axis. Again most of these options are largely a click and set type button. Firstly please make sure your equipment is attached to the computer and windows has found the device and it has been set up in Control Panel / Game Controller area. Run your profiler software if needed and deselect combined axis at a windows level if needed. Calibrate using windows software before attempting to setup in LFS. | This is the area where wheel and joystick users get to assign the axis. Again most of these options are largely a click and set type button. Firstly please make sure your equipment is attached to the computer and windows has found the device and it has been set up in Control Panel / Game Controller area. Run your profiler software if needed and deselect combined axis at a windows level if needed. Calibrate using windows software before attempting to setup in LFS. | ||
| Řádka 209: | Řádka 212: | ||
For those with a force feedback controller you must enable the Force Feedback to allow any previous settings to take effect – when finished you will need to test that each axis is correct and not reversed as sometimes controllers are wired different to normal and your brake or accelerator may be on all the time. If you then choose recalibrate you can then turn the wheel or joystick left & right to determine the maximum limits and see if you have maximum settings on throttle etc. If the settings are indeed reversed use the invert button next to the selected device to reverse polarity. Have a play with these settings and you’ll soon get the hang of the controls. | For those with a force feedback controller you must enable the Force Feedback to allow any previous settings to take effect – when finished you will need to test that each axis is correct and not reversed as sometimes controllers are wired different to normal and your brake or accelerator may be on all the time. If you then choose recalibrate you can then turn the wheel or joystick left & right to determine the maximum limits and see if you have maximum settings on throttle etc. If the settings are indeed reversed use the invert button next to the selected device to reverse polarity. Have a play with these settings and you’ll soon get the hang of the controls. | ||
| − | + | Pro rozsahy otáčení volantu pro každé auto, vizte [[Auta#Stupně_rotace_volantu_jednotlivých_aut|tuto stránku]]. | |
== Hra == | == Hra == | ||
| − | [[image:Game.jpg|thumb| | + | [[image:Game.jpg|thumb|Hra]] |
Zde můžete nastavit různá menší nastavení. Např.: ukládání způsob replayů, pořadí na startu. Můžete změnit jména AI jezdců, třeba byste si chtěli zazávodit proti Ayrtonu Sennovi nebo Michaelu Schumacherovi. Nejdůležitější funkcí vůbec, je nastavení vlastních hlášek(např.: Sorry, Hello, atd..) pro rychle chatování během závodu, kdy budete příliš zaneprázdněni na to, abyste psali odpověď přímo. Délka zpráv je omezena, ale pro všechny důležité zprávy je místa dostatek. | Zde můžete nastavit různá menší nastavení. Např.: ukládání způsob replayů, pořadí na startu. Můžete změnit jména AI jezdců, třeba byste si chtěli zazávodit proti Ayrtonu Sennovi nebo Michaelu Schumacherovi. Nejdůležitější funkcí vůbec, je nastavení vlastních hlášek(např.: Sorry, Hello, atd..) pro rychle chatování během závodu, kdy budete příliš zaneprázdněni na to, abyste psali odpověď přímo. Délka zpráv je omezena, ale pro všechny důležité zprávy je místa dostatek. | ||
| Řádka 224: | Řádka 227: | ||
'''Jména AI / Tlačítka F:'''<br> | '''Jména AI / Tlačítka F:'''<br> | ||
| − | ''Jména AI'' | + | ''Jména AI'' – Můžete nastavit jména 12 AI závodníkům.<br> |
| − | ''F1 | + | ''F1–F8'' – Klikněte na prázdné políčko a přiřaďte požadovaný text tlačítkům F1 – F8. Kódy jsou zde stejné jako při použití klávesy "T" (k mluvení/chatu).<br> |
| − | ''CTRL +'' | + | ''CTRL +'' – Stejná funkce jako výše, ale v kombinaci se stlačenou klávesou CTRL. K dispozici navíc máte i klávesy F9–F12. |
| − | ''ALT +'' | + | ''ALT +'' – Stejná funkce jako výše, ale v kombinaci se stlačenou klávesou ALT. K dispozici navíc máte i klávesy F9–F12. |
| − | == | + | == Ostatní == |
| − | [[image:Misc.jpg|thumb| | + | [[image:Misc.jpg|thumb|Ostatní]] |
| − | + | Zde je 17 různých nastavení včetně těch, které mění hratelnost nebo [[Slovník LFS pojmů#F|FPS]]. | |
| − | ''' | + | '''Vertikální synchronizace:''' vypnuto/zapnuto |
| − | ''' | + | '''Omezit FPS ve hře:''' vypnuto/zapnuto, this is used in conjunction with the next option to set what max frame rate to use. |
'''Maximum frame rate:''' Here you can set a minimum / maximum number of frames for use in game – depends upon the previous setting to enable/disable. | '''Maximum frame rate:''' Here you can set a minimum / maximum number of frames for use in game – depends upon the previous setting to enable/disable. | ||
| − | ''' | + | '''Minimální prodleva:''' Nastavení časové hodnoty v milisekundách. This setting forces LFS to sleep/wait the set amount of time between each frame, to allow Windows to update controller inputs, etc. Increase this value if you're having problems with controller stuttering/lag or similar. Don't put it too high, though, as it will limit your maximum framerate. |
'''Screen clear type:''' Ellipsoid and Clr+Sky are the same quality but just drawn in a different way to allow for what’s best with different cards. Usually it makes no difference but choose the one which gives the better frame rate. Plain draws no sky, which can increase your framerate on older systems. | '''Screen clear type:''' Ellipsoid and Clr+Sky are the same quality but just drawn in a different way to allow for what’s best with different cards. Usually it makes no difference but choose the one which gives the better frame rate. Plain draws no sky, which can increase your framerate on older systems. | ||
| − | '''Log messages:''' | + | '''Log messages:''' Vypnuto/zapnuto – this option will keep a log of all the text chatter between players. |
| − | '''AI use player setup:''' | + | '''AI use player setup:''' mluví za vše |
| − | '''AI use player colours:''' | + | '''AI use player colours:''' mluví za vše |
| − | ''' | + | '''Zpoždění zvuku:''' Because the program has to play the sound slightly in advance, so that there are no gaps in the sound. Recommended setting is as low as possible without hearing stutters or gaps in the sound. |
'''Analogue steer smooth:''' Sets the amount of smoothing for joysticks and some wheels. The higher the value, the smoother your inputs will be, but they will also lag behind slightly. | '''Analogue steer smooth:''' Sets the amount of smoothing for joysticks and some wheels. The higher the value, the smoother your inputs will be, but they will also lag behind slightly. | ||
| − | ''' | + | '''Zrychlení online hry:''' This options makes the distant cars use less cpu by not updating their physics or drawing them at all. It’s disabled when you view from the TV cameras because frame rate isn’t so important then.. |
'''Multiplayer car draw:''' Only visible when the above option is enabled. Sets the distance the cars are drawn. Use a lower value for increased framerates. | '''Multiplayer car draw:''' Only visible when the above option is enabled. Sets the distance the cars are drawn. Use a lower value for increased framerates. | ||
| − | ''' | + | '''Dynamická redukce detailů:''' Nastavuje hodnotu dynamické změny úrovně detalů hry. Nastavením hodnoty 0 se detaily neredukují a 1 znamená, že se detaily plně redukují. This makes the Level of Detail change dynamically depending on how many cars are visible and on your current framerate. Use higher values if you experience slowdowns when multiple cars are visible. |
| + | |||
| + | '''Update stopy:''' 3 options – Off, User car or All cars – This determines which cars update the rubber mark on the track – the racing line rubber. | ||
| − | ''' | + | '''Nahrát trať při spuětění:''' Ano/ne. Pokud je zvolena možnost Ne, doba spouštění LFS se znatelně zmenší. |
| − | ''' | + | '''12hodinový formát času:''' mluví za vše |
| − | ''' | + | '''Zobrazit čas místo FPS:''' Ano/ne. Po zapnutí se místo FPS zobrazí místní čas. |
| − | + | [[de:Optionen]] | |
| + | [[en:Options]] | ||
| + | [[es:Opciones]] | ||
| + | [[fr:Options]] | ||
| + | [[it:Opzioni]] | ||
| + | [[ja:オプション]] | ||
| + | [[pl:Opcje]] | ||
Aktuální verze z 21. 11. 2012, 23:38
Zvuk
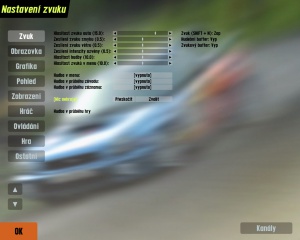
Umožňuje měnit úrovně hlasitosti hudby a ostatních zvuků.
Hlasitost zvuku auta: Ovládá hlasitost zvuku všech aut relativně k hudbě a zvukům rozhraní.
Hlasitost zvuku smyku: Zesílí reálný zvuk smyku, aby byl lépe slyšet. Nastavte na 1 pro "realistickou" hlasitost.
Hlasitost zvuku větru: Stejné jako výše, ale pro větrné efekty. Všimněte si, že bez ohledu na toto nastavení, bude hluk způsobený obtékajícím vzduchem mnohem vetší u otevřených aut, než u vozů s pevnou střechou.
Intenzita ozvěny: Určuje hlasitost ozvěny. Základní hodnota 2,0 by měla být realistická, ale můžete ji samozřejmě změnit, aby vám vyhovovala.
Hlasitost hudby: Hlasitost hudby v menu a ve hře.
Hlasitost zvuků v menu: Hlasitost zvuků tlačítek a ostatních v menu hry.
Hudba v menu: Zapíná, nebo vypíná hudbu v menu.
Hudba v průběhu závodu: Zapíná, nebo vypíná hudbu, která hraje v průběhu závodu.
Hudba v průběhu záznamu: Zapíná, nebo vypíná hudbu, která hraje v průběhu záznamu.
Výběr skladby: Pomocí tlačítek "přeskočit" a "zvolit" si můžete vybrat skladbu, která se má přehrát.
Hudba v průběhu hry: LFS podporuje playlisty a zde můžete vidět a měnit, který playlist je zrovna přehráván. Pomocí "přeskočit" se můžete o skladbu přesunout, pomocí "zvolit" můžete skladbu přímo vybrat.
Kanály: Pomocí tohoto tlačítka se dostanete do rozhraní pro vytváření a úpravu playlistů. Channel 1 je standardní pro všechny obrazovky nastavení a nemůže být smazán. Jednotlivé playlisty můžete přidávat, přejmenovávat a mazat v levé časti obrazovky. Vpravo můžete přidávat stopy, přiřazovat skladby jednotlivým stopám a mazat stopy. K zajištění, že stopy budou přehrávány, můžete nastavit jejich prioritu(3 nejvyšší, 1 nejnižší).
TIP: Hudební soubory v LFS jsou ve formátu Ogg Vorbis. Můžete vytvářet své vlastní hudební soubory pomocí volně dostupného převaděče na www.vorbis.com nebo pomocí Audacity. Aby mohly být skladby přehrány v LFS, musí být ve složce data/ogg .
Obrazovka
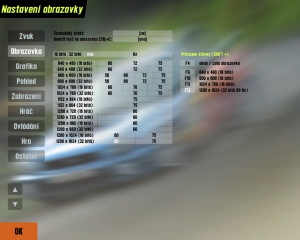
V tomto menu si můžete zvolit požadované rozlišení, barevnou hloubku a obnovovací frekvenci obrazovky. Můžete také přiřadit klávesové příkazy jednotlivým konfiguracím obrazovky.
Tlačítka 16 bitů | 32 bitů | vše: Přepne módy na 32bitovou, 16bitovou nebo všechny barevné hloubky.
Širokoúhlý efekt: Simuluje efekt sledování širokoúhlého filmu na běžné 4:3 TV, zobrazením černých pruhů nahoře a vespod obrazovky.
Omezit myš na okno: Pokud hrajete LFS v okně, můžete snadno opustit ukazatelem okno. To může být problém, pokud používáte k řízení myš. Tato volba zabraňuje ukazateli myši opuštění okna LFS. Tato volba může být zapnuta a vypnuta také pomocí klávesové zkratky Ctrl+C.
Přiřazení kláves: Umožní přiřadit požadované rozlišení, barevnou hloubku a obnovovací frekvenci obrazovky jednomu ze čtyř dostupných klávesových příkazů Shift+F9 – Shift+F12. Zvolte požadované nastaveni a poté klikněte na jedno z tlačítek vpravo.
Grafika
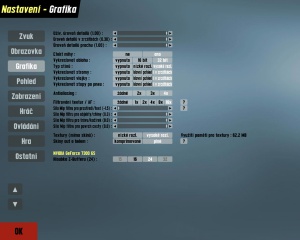
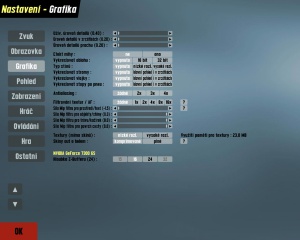
V tomto menu najdete veškerá nastaveni pro kvalitu grafiky. Pečlivé vyladění těchto nastavení, může zvýšit framerate, nebo vylepšit kvalitu detailů. Vypnutím, nebo snížením některých možností můžete podstatně vylepšit herní prožitek, zejména u počítačů, jejichž sestava není zrovna nejnovější.
Úroveň detailů: Tato volba ovlivňuje úroveň detailů ve hře, tzn. kvalitu objektů a textur a vzdálenost vykreslování. Například pneumatiky budou na počítači se sníženými detaily vypadat hranatě.
Výkon: 0.40 | kvalita: 1.00
Úroveň detailů v zrcátkách: Ovlivňuje kvalitu obrazu v zrcátkách, podobně jako "Uživ. úroveň detailů" v kokpitu.
Výkon: 0.25 | kvalita: 1.00
Úroveň detailů prachu: Volba ovlivňuje kvalitu prachu a kouře.
Výkon: 0.25 | kvalita: 1.00
Anti-aliasing: Čím vyšší hodnota, tím jsou hrany objektů více vyhlazené.
Filtrování textur / AF: Textury jsou vytvořeny v různých úrovních detailů závisejících na velikosti, ve které budou vykresleny na obrazovce. Tyto úrovně detailů se nazývají mipmapy. V případě, že je textura vykreslena v menší velikosti (např. pokud je objekt daleko), je použita menší mipmapa.
Volba filtrování textur ovlivňuje způsob míchání mipmap.
žádné : Bilineární filtrování – žádné míchání – bude použita pouze nejbližší mipmapa
1x : Trilineární filtrování – výsledný obrázek je smíchán ze dvou nejbližších mipmap
2x–16x : Anisotropické filtrování – snižuje rozmazání objektů vykreslených v nepřímých úhlech.
Pohled
Nastavení v menu Pohled upravuje pohled kamery ve hře. Vytvoření osobního nastavení se doporučuje a správný pohled pro požitek z jízdy je nejdůležitější. Pojďme si projít, jaké jsou možnosti od shora až dolů.
Zorné pole: Šířka pohledu ve hře, také známá jako úroveň zoomu. Menší nastavení zorného pole způsobí, že to, co je uprostřed obrazovky, bude větší, ale naopak nebude téměř nic vidět po stranách, což je také důležité. Větší zorné pole vytvoří dobrý výhled po krajích, ale uprostřed bude pohled vzdálený. Je na vás, jak si zorné pole nastavíte, zkuste si s tím pohrát. Implicitní nastavení je okolo 90°.
Posuny/sklony řidiče při 1 G: Definice toho, jak se pohled z auta nebo volitelný pohled posunují a naklánějí podle G sil. Pokud všechny hodnoty nastavíte na 0, kamera se nebude jakkoliv hýbat.
Standardní pohled jezdce: Ve hře lze mít 2 statické kamery, a to buď standardní pohled z kokpitu, který je nejrealističtější, nebo vlastní pohled, který může být umístěn kdekoliv. Jak si vytvořit vlastní pohled, bude vysvětleno později. Výběrem jednoho z nich jej nastavíte jako implicitní a pohled bude nastaven pokaždé když hru spustíte. Také se na něj lze přepnout pomocí kláves SHIFT + F1.
Sklon pohledu: Vertikální náklon kamery. Zde se nastavuje vertikální směr kamery, při nastavení kladné hodnoty se kamera může naklánět nahoru a při zadání záporné hodnoty se kamera naklání dolů.
Rotace pohledu: Horizontální natočení kamery. V záporných hodnotách se kamera otáčí doleva a při kladných se otáčí doprava.
Posun zrcátka: Změněním těchto hodnot se zpětné zrcátko posune horizontálně (boční posun zrcátka) a nebo vertikálně (výškový posun zrcátka). Ujistěte se, že je zrcátko dobře viditelné a že v něm dobře uvidíte auta za vámi.
Typ budíků: To určuje, jak jsou budíky (rychloměr, palivo atd.) zobrazeny. 'Vyp' nezobrazí nic, 'skutečné' zobrazí budíky přímo ve voze a 'virtuální' je zobrazuje na obrazovce mimo auto.
Pohybovat pohledem s animací: Toto nastavení určuje, jestli se má kamera pohledu jezdce pohybovat synchronně s pohybem řidiče. Je to reálné, ale je na každém, zda si to nastaví nebo ne.
Zobrazit řidiče / volant: Toto nastavení mění to, co vidíte z pohledu z kokpitu. Buď je zobrazen, řidič s volantem, nebo pouze volant a nebo nic. Lidé, kteří používají pro ježdění volant, si zpravidla volant skryjí, protože to nevypadá zrovna reálně mít dva volanty pohybující se tím samým směrem.
Ovládání pohledu: Pomocí této volby můžete nastavit různé další způsoby otáčení pohledu doleva nebo doprava. Zvolením možnosti Osa se pohled bude otáčet pomocí osy zvolené v menu Ovládání. Po zvolení volby zatáčení se bude natáčet pohled při zatáčení. Pokud tedy budete zatáčet doleva, pohled se také natočí doleva. To se může hodit, dyž chceš vidět více do směru, kam zatáčíš. Pomocí posuvníku Citlivost pohledu lze nastavit, jak hodně se kamera bude otáčet. To find a good value for the sensitivity, steer all the way to one side and adjust the Look sensitivity to what is the maximum allowed amount of movement to one side. Ms X will move the camera left and right along with the mouse. Look sensitivity does the same as described above. Look centre reduction will alow you to define how easily the camera should stay in the forward looking position. Setting it at a high value will result in having to move the mouse alot to move it out of the forward looking position. At a low value, it will move exactly like the mouse with no centre movement reduction. Ms XY does the same except the camera moves up and down with your mouse as well, making it more adjustable.
Pohled tlačítkem: Setting this option will define how the camera should look left and right when you press the Look left and Look right buttons specified in the Controls menu. Smooth will pan the camera gently to the side when you press the button, instant will show you the side inmediately without movement.
Nastavení vlastního pohledu
(Note: every custom camera you set up is saved per car. This way you can make a different custom camera in every car.)
Go to the View options and click on custom in the Default driver view option. Notice that new options are available now called Settings for custom view.
The Style option adjusts how the car itself is displayed. No draw shows no car at all, wheels shows only the wheels, external always shows the car wich is the most realistic and ext.2 is the same as external but it does not show the car when you look left or right with the look left and right buttons.
Clocks mode: This defines how the car's gauges and meters are displayed. Off displays nothing, Real shows them on the car's dashboard and Virtual shows them on your display.
The X offset, Y offset and Z offset, the most important settings of a custom view, define the custom camera's position. X offset moves the camera left and right, Y offset moves the camera forwards and backwards and Z offset moves the camera up and down.
Pitch view: The horizontal direction of the camera can be selected here, it can aim upwards with a positive amount, or it can aim downwards with a negative amount.
Rotate view: The vertical direction of the camera. It can aim left with a negative value or aim right with a positive value.
The mirror offsets: Adjusting these will position the front mirror horizontally (mirror offset lateral) and vertically (mirror offset vertical). Make sure it's visible as it's useful tool to notice cars behind you.
An example of a nice view in the XF GTI:
Style set to external, X offset to -0.315, Y offset to 0.547, Z offset to 0, Pitch and Rotate to 0.
When you are done setting up a custom camera, click in car again in the Default driver view option if you want the default view to be used as the standard view. Though, if you are happy with the new custom view, keep it on custom so it will always be used as the primary view.
Užitečné klávesy a zkratky
V : Přepíná mezi pohledy.
SHIFT + V : Přepíná mezi kamerami pozpátku.
TAB : Přepne na další auto.
SHIFT + TAB : Přepne na předchozí auto.
HOME : Přepne na tvé auto.
SHIFT + F1 : Vrátí pohled na standardní pohled.
SHIFT + F : Skryje texty a zobrazení kromě chatu.
SHIFT + M : Přepíná režimy zrcátek. (Bez zrcátek, pouze reálná zrcátka nebo reálná zrcátka + virtuální.)
SHIFT + U : Přepne do autokrosového editor/Free view -mode.
Zobrazení
Můžete si zde změnit rychloměr, typ zrcátek nebo zapnout mapu tratě.
Zobrazit počet snímků za vteřinu: Vypnuto / Vlevo / Vpravo
Digitální rychloměr: Ano / Ne
Mód zrcátek: Vypnuto / Skutečné / Virtuální / Vše.
Zobrazit stíny: Ano / Ne
Velikost textu zprávy: Upraví velikost textu zobrazeného ve hře, 0.70 je přijatelná hodnota.
Display results: Shows a transparent panel that updates and shows lap time differences etc, you can turn on or off here or toggle with Strg + Tab toggle
Overall times display: Absolute shows most recent gap time for each car compared to each other car. Relative shows the individual gap between each car relative to the lead car.
Indikátor manuálního řazení: Set to show upshifts only, downshifts only or leave to show all shifts or not display them at all.
Hráč
V tomto menu si můžete upravit detaily o sobě, např. jméno, text SPZ nebo zemi, ze které pocházíte. Můžete si zde také vybrat jezdce(muže či ženu), helmu nebo barvu kombinézy.
Ovládání
Mouse/Keyboard
Button control rate: This is for when you assign a button to an analogue control (e.g. handbrake or clutch) how fast the control moves when the button is pressed. Higher is faster.
Keyboard steer: keyboard – no help / keyboard – stabilised / mouse steer toggle. This is how you select your input method:
Mouse steer (rather obviously) lets you use the mouse for steering and assign throttle and brake to buttons (be they on your keyboard or your mouse).
Klávesnice – bez usnadnění directly translates button presses into wheel movement. So long as the button is held down, the wheel will continue turning until it reaches maximum lock. There is an auto return to centre function when no steering keys are pressed. Both rates are configurable. Also, pressing both left and right will hold the wheel in its current position. This steering method is definately not recommended, since it is impractically difficult to race with.
Klávesnice – se stabilizací has two main differences to "keyboard – no help". Firstly, it limits the movement of the wheel depending on the amount of grip the tyres have. This limit is also adjustable. Secondly it adds a small amount of automatic countersteering to help balance the car. While this is a driving aid (and the turn limit can be considered one as well), it is essential for using such a basic input device for a task it obviously would never be used to do in real life. Thankfully the keyboard steering is highly configurable in LFS so you should be able to get it to work to your preference.
Automatická převodovka: Ano/Ne. Pokud je nastaveno na Ano, počítač bude za vás řadit (a pravděpodobně ve špatný čas).
Mouse steer only:
Steer centre reduction: This is a non-linearity slider and is designed to make it easier to control the car buy reducing straight line twitchyness. A setting of 0.0 gives fully linear steering whereas a setting of 1.0 gives fully non-linear steering. A setting of 0.4 to 0.6 is recommended.
Keyboard steer only:
Steer rate: The speed the wheel turns when you press the left or right steer buttons. Higher values will make the car more responsive but less stable, and vice versa.
Return rate: The speed the wheel turns when you depress the left or right steer buttons. Higher values will make the car more responsive but less stable, and vice versa. It is usual to use a lower value for the return rate, between 50 to 75 % of the steer rate.
Fast steer multiplier: When holding the "Steer Fast" key, the steer rate will be temporarily increased. This slider controls by what percentage it will be increased. With the default setting of 2.00, the steer rate will be doubled. This fast steering option can be useful when quick corrections are needed, such as when countersteering. Chances are you're going to crash anyway so this option is of limited helpfulness.
Slow steer multiplier: When holding the "Steer Slow" key, the steer rate will be temporarily reduced. This slider controls by what percentage it will be reduced. With the default setting of 0.50, the steer rate will be halved. This slow steering option is most useful at higher speeds when finer control over the vehicle is needed. However the keyboard steering is automatically speed sensitive, so there is really no need to ever use this anyway.
Limit multiplier: A setting of 1.0 limits the wheel turn to that of the available grip of the tyres. Settings higher than this allow you to turn further, to induce understeer. Settings lower than 1.0 means you won't get so close to the limits of the car, so control is retained. The further you reduce this setting, the easier the car will be to drive, at the sacrifice of cornering speed. (available with Keyboard – stabilised only)
In the Buttons 1 subsection you select which button to assign to the function labelled to the right of the button. To choose and lock in your selection, simply click on the button to highlight it, a text message with instructions will appear at bottom of screen, Click desired button or key you wish to associate with this button etc. Do this for all Button 1 selections, then move on to Button 2 section using the same method to select and assign your desired keys or buttons to control the views etc.
When you have completed this, mouse users and keyboard users are finished, and may want to skip the section on wheels and joysticks. And go directly to the far right of this screen and look closely at the various key sequences and what they do. i.e. (Reserved keys) and Shift + combinations.
Volant/Joystick
This section provides different options additional to the previous section. Existing keyboard and mouse settings can still be used just by clicking on the Mouse/KB button. This is useful if your wheel breaks or springs in pedal fall apart.
After selecting to enable your wheel you will need to set it up for maximum efficiency depending on the make and whether is has force feedback functions etc some options will not be needed or may be used if desired. Please note that you might have to change some settings in the drivers of your wheel manufacturer, e.g. to enable split axes.
Steer center reduction: Adjusts the turn ratio of the users wheel to the LFS car.
Síla FF: Pro ty, kteří používají Force Feedback, větší hodnota znamená větší síla.
Throttle/brake axis: Can be one of three different states:
Kombinované: brzdový a plynový pedál jsou na stejné ose
Separované: brzdový a plynový pedál jsou každý na jiné ose
Tlačítka: brzda a plyn mohou být jako tlačítko/pádlo
Typ řazení: We have discussed earlier the three types and their use.
Clutch & Handbrake: Can be assigned to any spare axis or button if you wish.
Throttle/brake centre reduction: Adjusts the sensitivity of the throttle and brake and the point at which it starts to apply.
Nastavení volantu
This is the area where wheel and joystick users get to assign the axis. Again most of these options are largely a click and set type button. Firstly please make sure your equipment is attached to the computer and windows has found the device and it has been set up in Control Panel / Game Controller area. Run your profiler software if needed and deselect combined axis at a windows level if needed. Calibrate using windows software before attempting to setup in LFS.
When you arrive at the controls screen shown above you be able to choose a range of options from those available to make your wheel or joystick work best with LFS. To select an axis click on the button lets start with Steer: Highlight steer and you will notice the panel available axis will light up from there you can choose which of the axes to use. The bar next to the axis will show you the range of motion of the mapped device and is used to calibrate. Highlight and select as many or as few as you wish.
For those with a force feedback controller you must enable the Force Feedback to allow any previous settings to take effect – when finished you will need to test that each axis is correct and not reversed as sometimes controllers are wired different to normal and your brake or accelerator may be on all the time. If you then choose recalibrate you can then turn the wheel or joystick left & right to determine the maximum limits and see if you have maximum settings on throttle etc. If the settings are indeed reversed use the invert button next to the selected device to reverse polarity. Have a play with these settings and you’ll soon get the hang of the controls.
Pro rozsahy otáčení volantu pro každé auto, vizte tuto stránku.
Hra
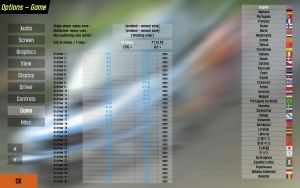
Zde můžete nastavit různá menší nastavení. Např.: ukládání způsob replayů, pořadí na startu. Můžete změnit jména AI jezdců, třeba byste si chtěli zazávodit proti Ayrtonu Sennovi nebo Michaelu Schumacherovi. Nejdůležitější funkcí vůbec, je nastavení vlastních hlášek(např.: Sorry, Hello, atd..) pro rychle chatování během závodu, kdy budete příliš zaneprázdněni na to, abyste psali odpověď přímo. Délka zpráv je omezena, ale pro všechny důležité zprávy je místa dostatek.
V pravé části obrazovky si můžete změnit Jazyk.
Uložení záznamu offline hry: Vypnuto / Zapnuto / Auto uložení. Nastaví, jak budou replaye ukládány. Vypnuto>replaye se neukládají vůbec. Zapnuto> Nahrávání replaye je zapnuto, ale musíte je ukládat manuálně(ve hře, stiskněte "1" pro uložení s automaticky generovaným názvem, nebo "2" pro uložení s vámi zadaným názvem). Auto uložení>všechny replaye jsou ukládány s automaticky generovaným názvem, aniž byste se o to museli starat.
Uložení záznamu online hry: Stejné jako u offline hry.
Restart závodu bez kvalifikace: Nastaví, v jakém pořadí na roštu budou (re)startovat závody bez kvalifikace.
Jména AI / Tlačítka F:
Jména AI – Můžete nastavit jména 12 AI závodníkům.
F1–F8 – Klikněte na prázdné políčko a přiřaďte požadovaný text tlačítkům F1 – F8. Kódy jsou zde stejné jako při použití klávesy "T" (k mluvení/chatu).
CTRL + – Stejná funkce jako výše, ale v kombinaci se stlačenou klávesou CTRL. K dispozici navíc máte i klávesy F9–F12.
ALT + – Stejná funkce jako výše, ale v kombinaci se stlačenou klávesou ALT. K dispozici navíc máte i klávesy F9–F12.
Ostatní
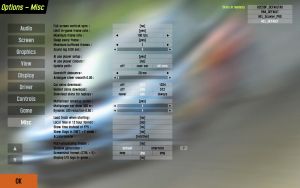
Zde je 17 různých nastavení včetně těch, které mění hratelnost nebo FPS.
Vertikální synchronizace: vypnuto/zapnuto
Omezit FPS ve hře: vypnuto/zapnuto, this is used in conjunction with the next option to set what max frame rate to use.
Maximum frame rate: Here you can set a minimum / maximum number of frames for use in game – depends upon the previous setting to enable/disable.
Minimální prodleva: Nastavení časové hodnoty v milisekundách. This setting forces LFS to sleep/wait the set amount of time between each frame, to allow Windows to update controller inputs, etc. Increase this value if you're having problems with controller stuttering/lag or similar. Don't put it too high, though, as it will limit your maximum framerate.
Screen clear type: Ellipsoid and Clr+Sky are the same quality but just drawn in a different way to allow for what’s best with different cards. Usually it makes no difference but choose the one which gives the better frame rate. Plain draws no sky, which can increase your framerate on older systems.
Log messages: Vypnuto/zapnuto – this option will keep a log of all the text chatter between players.
AI use player setup: mluví za vše
AI use player colours: mluví za vše
Zpoždění zvuku: Because the program has to play the sound slightly in advance, so that there are no gaps in the sound. Recommended setting is as low as possible without hearing stutters or gaps in the sound.
Analogue steer smooth: Sets the amount of smoothing for joysticks and some wheels. The higher the value, the smoother your inputs will be, but they will also lag behind slightly.
Zrychlení online hry: This options makes the distant cars use less cpu by not updating their physics or drawing them at all. It’s disabled when you view from the TV cameras because frame rate isn’t so important then..
Multiplayer car draw: Only visible when the above option is enabled. Sets the distance the cars are drawn. Use a lower value for increased framerates.
Dynamická redukce detailů: Nastavuje hodnotu dynamické změny úrovně detalů hry. Nastavením hodnoty 0 se detaily neredukují a 1 znamená, že se detaily plně redukují. This makes the Level of Detail change dynamically depending on how many cars are visible and on your current framerate. Use higher values if you experience slowdowns when multiple cars are visible.
Update stopy: 3 options – Off, User car or All cars – This determines which cars update the rubber mark on the track – the racing line rubber.
Nahrát trať při spuětění: Ano/ne. Pokud je zvolena možnost Ne, doba spouštění LFS se znatelně zmenší.
12hodinový formát času: mluví za vše
Zobrazit čas místo FPS: Ano/ne. Po zapnutí se místo FPS zobrazí místní čas.
